

Featured




Phoenix Strikes Back
Special ProjectsPhoenix STRIKES BACK – a TM G36k Recoil sheds its skin for a new look
UpGrading the TM G36k 'Recoil' Can it be done - YES!
By RaptorAirsoft Gun Tech JohnnyJ
On most projects like this you do run the risk of killing your guns but for this project I'm happy to say not a single part of the TM G36k was modified or harmed in the process so you only run the risk of killing your donor AEG, in this case the Ares G36 (our original Phoenix Rising AEG Project Gun).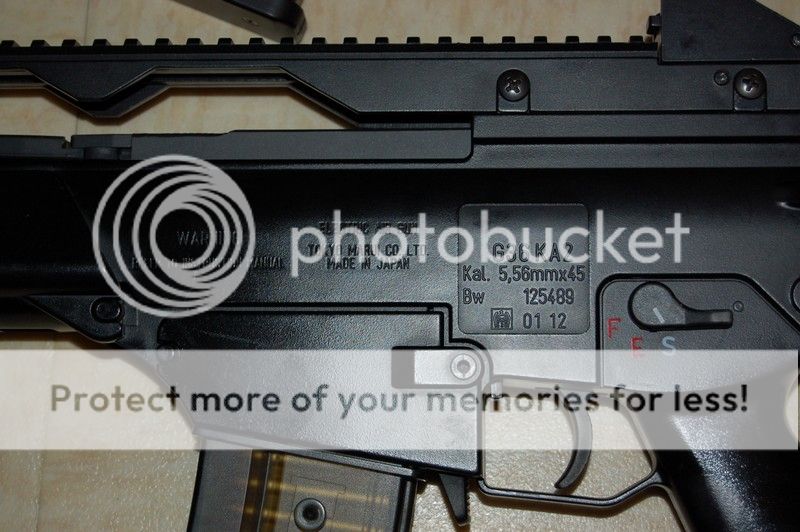 A month ago I was passed a TM G36k recoil for a simple service by a pal from my regular site SWAT AREA51. The gun was 18 months old and hadn’t been serviced since new. Once I had received the gun, I placed it on my work bench ready to be worked on and I could not help thinking "It looks ugly!" referring to how shiny the gun was looking (typical for most TM branded AEG’s), at that point my eyes looked over into the corner where the old PROJECT PHOENIX was looked dejected due to having had parts robbed in order to get a mates Ares UMP up & running.
Before I knew it, I had stripped the Ares G36 down fully and started pulling the TM G36 apart just to see how much difference there was between the two guns. A very large grin soon developed across my face as I soon realized just how very close they are!
A quick phone call to the owner to ask if he wanted his TM guns body upgraded and he was more than happy for the project to happen, so long as no TM parts had to be modified.
Now this should have been a super quick little project but sadly my Dremel decided to break, so out came the tool box. With all the parts in front of me I decided to attack the front end of the gun first.
In the TM G36 the charge handle-fake bolt-recoil weight are all held in a metal carrier, it was a couple of mm’s out in places, one of the holding lugs (see FIG1) needed trimming down, for this I used a Stanley Knife just to trim the edges a little so it would fit inside the metal carrier. Next was the very front of the body (FIG2) this again just needed trimming a little, for this I used the knife and needle file taking a little off at a time, until the fit was perfect.
For this part you will need to take your time (FIG3) at the front of the charge handle on the body there is a body pin, you will need to trim this down a little at a time. If you remove too much the pin might not hold the body together! (you have been warned) and after I trimmed it down I used a very fine file to clean it up all the time fitting the carrier and closing both halves of the body checking for alignment and ensuring the fitting was tight.
Now the front was fitted, it was time to attack the rear of the body as the TM has its large recoil weight, you will need to remove anything that will foul it (FIG4). I cut what I could with the knife away and then used sand paper to finish the job, again always checking the fit with the gearbox. The gearbox will fit in the ARES lower with no problems; you just have to remove the wiring holder at the back of the gearbox so the rear body pin can pass.

Click for Larger Images and to see annotations
So, we are nearly done ! The last job is the stock metal frame, there is a bolt that holds the TM's recoil spring in place and this pass's through the metal stock frame, the threads inside the frame will need to be removed. To do this I had to use a round needle file but a Dremel with a drill bit will do this in seconds for you.
When building the gun back up it now has to be done like the old TM MP5's in a clam shell so just have the all the parts in place like the above photo, including putting the bolt in the stock frame ( it can be made tighter once built). Once it’s all together make sure all the parts move as they should, I found that the main area's that required sanding to be the cocking handle as it was just sticking a little.
With a Dremel I would say all of the work should take less than an hour, for me with hand tools it needed 2-3 hours with lots of little breaks for tea.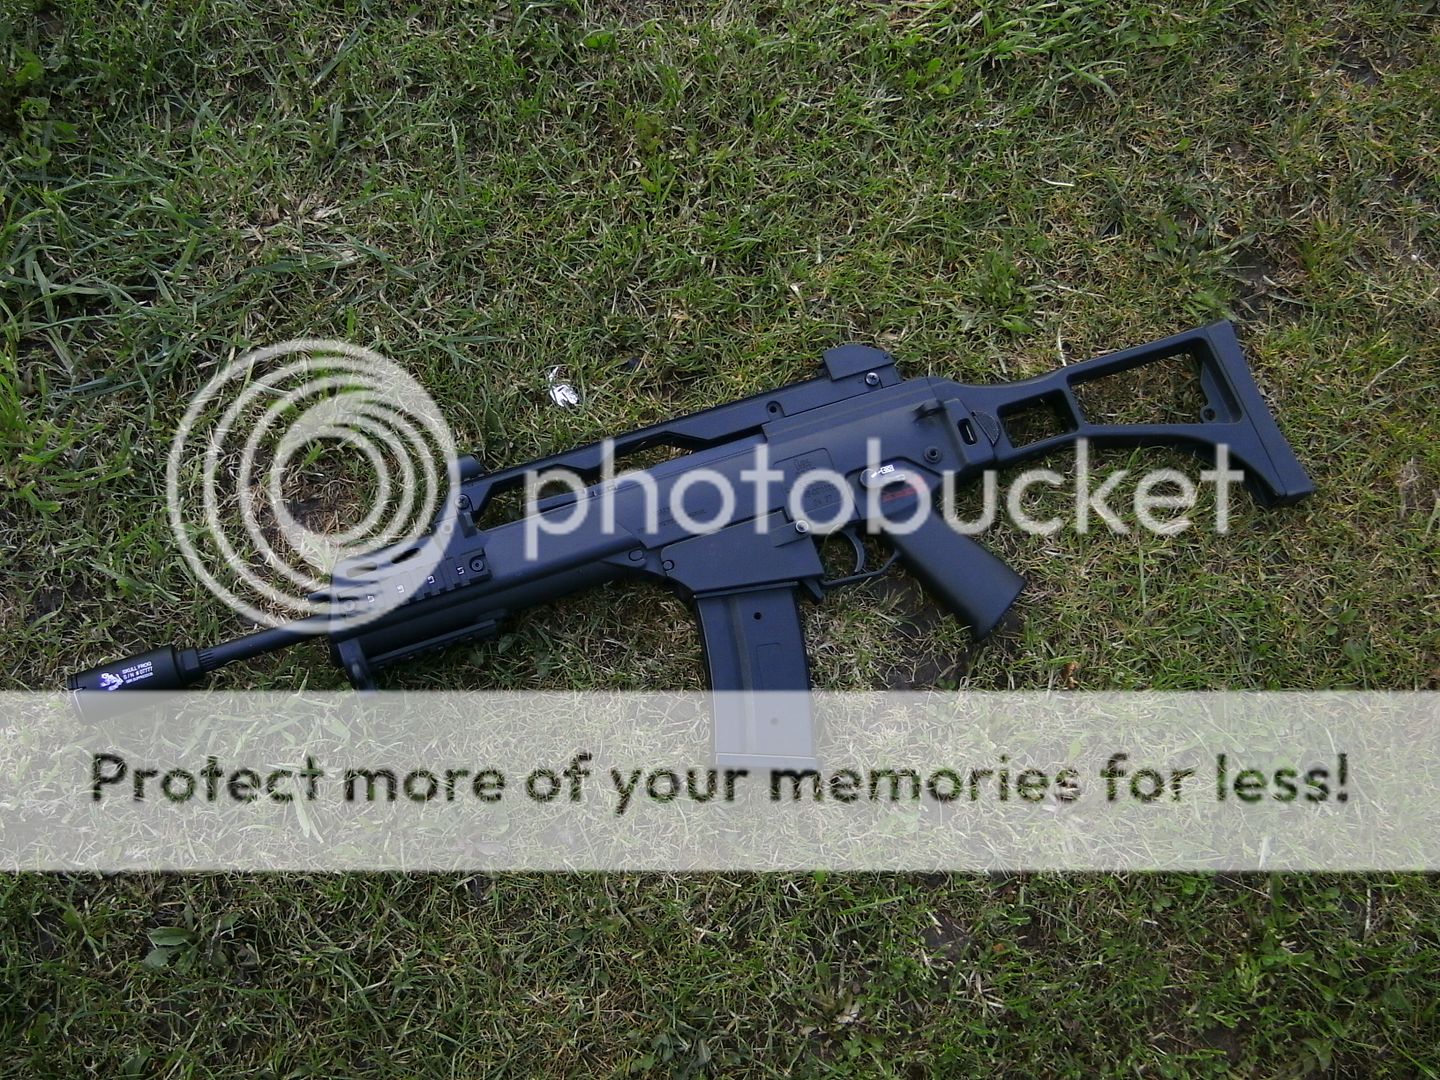 TOOLS USED
Stanley Knife
Needle file set
sand paper
Screw driver set
Dremel makes it easier!
Now all the work is done you can enjoy your TM Recoil and have
the added bonus of telling people what it is when they ask.
Catch up with the ORIGINAL Project Phoenix Rising series Starts here:
Phoenix Rising Announced
JohnnyJ is a brilliant airsoft tech with many years experience - he's the goto guy many of us use in the North West for fixes, services and repairs!
Follow new posts via TWITTER:
http://twitter.com/Airsoft_Odyssey
Checkout the Raptor Airsoft Facebook Page - for tech stuff
This Article & pictures are copyright 2012 by Yossers Airsoft Odyssey © and John Williams and may not be be copied or reproduced without permission. You may link to this page.
KEEP UP to DATE with Airsoft Odyssey via all these Multi-Media Outlets - please click the icons and Support the BLOG on:


Project Phoenix Part5
Special ProjectsPhoenix Rising – The ARES G36c from the ashes
The story of a Rebuild Bargain
PART FIVE – Player Feedback - The Final Installment
The mission is clear, A high end AEG for little cash! - was the mission achieved?
Bamf lets loose with the 'Phoenix'!
You could say I have a little bit of history with Heckler&Koch weapons partly due to my past experiences in the Army as part of the BAOR (British Army of the Rhine) and getting the chance to play with some Real Deal H&K Weapons courtesy of the Bundeswehr unit based right next door and latterly on tour in Northern Ireland with the Royal Ulster Constabulary. So my history is scattered with G3’s, H&K 53’s and of course the more famous MP5. It was of course like many that I became smitten with the MP5 and hence my love of most things H&K.
After taking up airsoft, the MP5 was the only gun I would use. All things H&K were beautiful to me. That is, until the G36 was released. I've never been a fan of futuristic looking weapons and the G36 was exactly that to me. An anathema, destroying my perceptions of all that I loved about H&K. I felt betrayed! This clouded perception was reinforced after using a Double Eagle G36C, which was all I imagined a G36 to be...plasticky and creaky, certainly not worth any more of my precious time.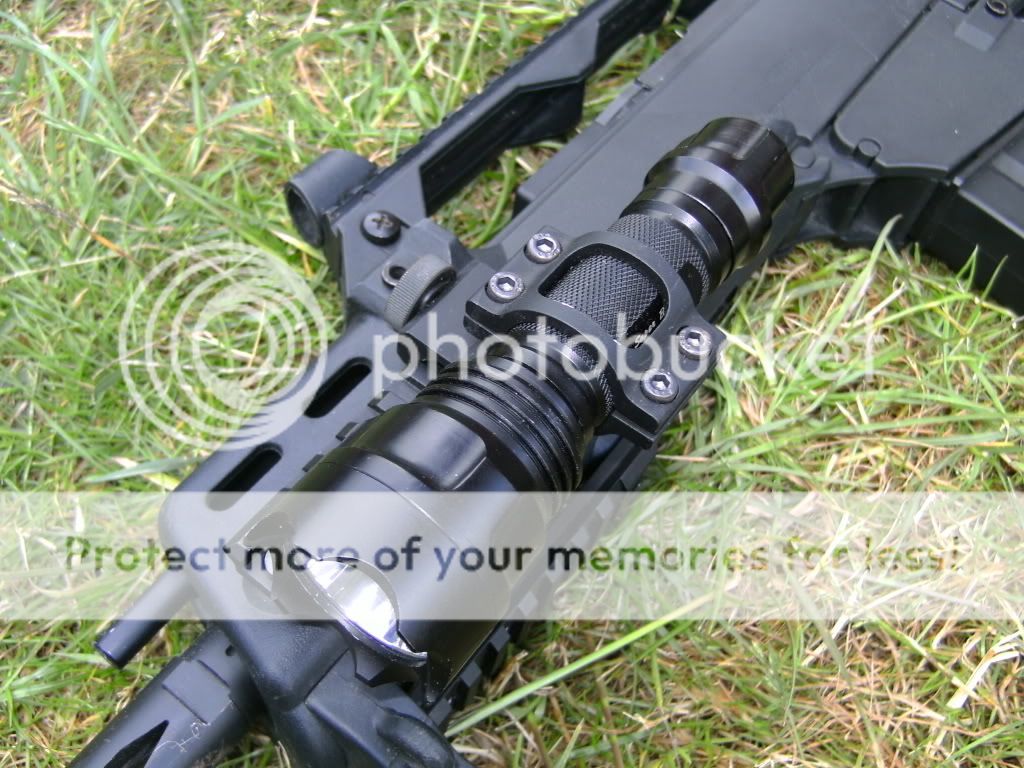 A Cheap G36c - with range!
I pretty much gave up all hope for H&K replicas after the Double Eagle incident, as I felt they'd taken a step in the wrong direction. This was all to change one fine day at SWAT Urban Area 51. I knew JJ had bought a cheap ARES G36c and had some successes with it, but as he'd paid such a minimal amount for it and given my experiences, my assumption was that it would be a pile of tat. How wrong can one be? Within minutes of the game starting, I saw John get a perfect kill at 45 meters plus!! I kid you not, he was right next to me and I was using my Classic Army B&T MP5A4. I stopped firing and turned to see if JJ had changed primary, but there was this "Cheap" G36C, still in his shoulder, putting rounds down!
Afterwards, I asked if I could look over it and asked what magic he'd worked on it. "None at all" was the reply? JJ had simply bought the gun in parts and had reassembled it. There was an issue with an air-seal, but as I'm not technically-minded, this went right over my head! As I stated earlier, I was expecting a lightweight piece of creaky plastic...I'm happy to say that this wasn't the case. Pleasantly surprised, this felt like the "Real-deal" it was solidly built, with a good weight to it. JJ allowed me the opportunity to use it on the range and I was more than impressed. This short dabble with "The Phoenix" had changed my mind completely.
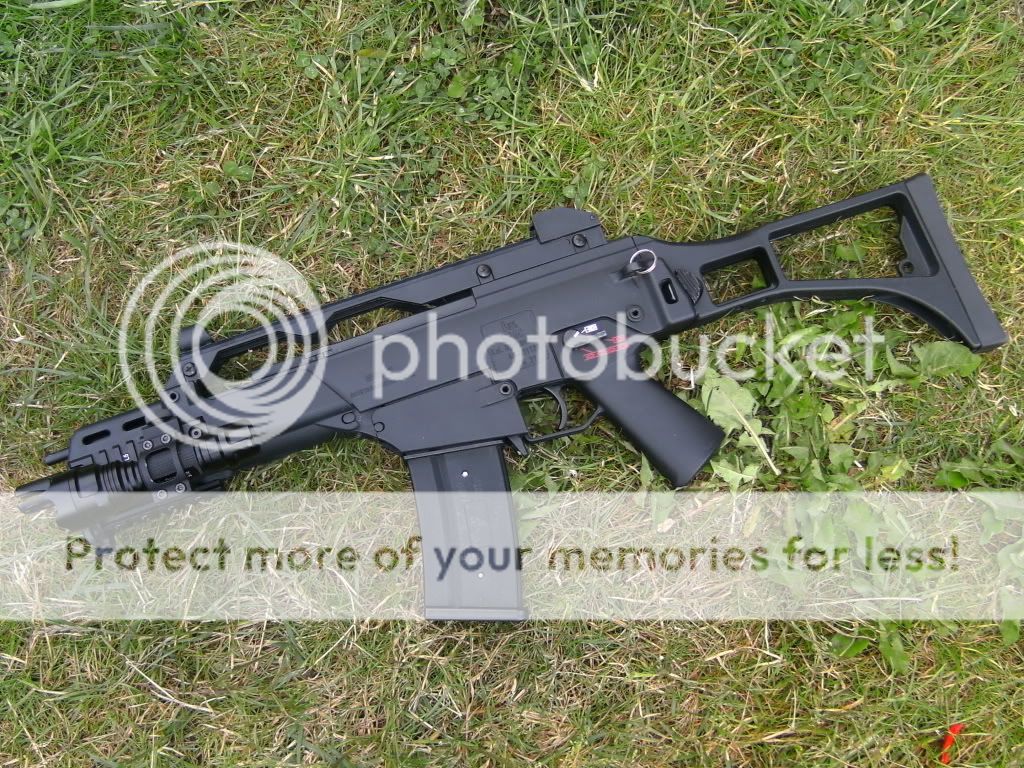
A G36 Convert!
I was now an Ares convert! I was a little sad that a traded AEG of mine became unusable during a game one week and JJ offered to take a look to see if he could fix the problem with it and so I could carry on playing he offered me ‘Phoenix’. I couldn't believe my luck, as I knew JJ had performed some upgrades on it and was happy with its performance. If he was happy, I was ecstatic! The trigger response was crisp and the rate of fire was good, without being too fast. Rounds hit where I was aiming and I felt myself grinning like a Cheshire cat that here I was, with a £60 gun, taking on guys with rifles that cost many multiples of that and getting hits with it!
Re-Tasking
I've now tasked JJ with performing this same feat (or as close as he can) with my Ares UMP . I couldn’t trust it to more knowledgeable AirsoftGun-Tech. Cheers JJ!
I could sum up the ‘Project Phoenix’ G36c as an ‘Excellent bargain and the guy who sold it must be kicking himself (& his brother)’. JJ who sourced and pulled the project together has a wealth of experience and brought his knowledge to bear on what has turned out to be a really great (& cheap) 2nd user AEG, breathing new life into it.
A BIG THANKS to King Arms for some great Upgrade parts!... Thanks Joe for the comments on project ‘Phoenix Rising’....
Catch up with previous posts in this series:
Phoenix Rising Announced
Phoenix Rising PART ONE - Spotting the Bargain
Phoenix Rising PART TWO - The Build
Phoenix Rising PART THREE - Rise of The Phoenix
Phoenix Rising PART FOUR - The Phoenix Strikes
Keep up to date on the blog via Twitter: Follow @Airsoft_Odyssey
Checkout the KingArms website for more great upgrade parts from shims, gears, mech boxes, motors and more plus their range of AEG's and accessories
This Article & pictures are copyright 2011 by Yossers Airsoft Odyssey © and John Williams and may not be be copied or reproduced without permission. You may link to this page.
Project Phoenix Part4
Special ProjectsPhoenix Rising – The ARES G36c from the ashes
The story of a Rebuild Bargain
PART FOUR – The PHOENIX Strikes
The mission is clear, A high end AEG for little cash!
Let’s get shooting!
Chrono Results
So the time has come to use my bargain ARES G36c in anger, would it last the course? The first test the AEG would face was the chrono and it came out a very site friendly 328-332 over 2 shots, so well below the 350 limit.
I managed to get a lot of kills during the day with ‘Phoenix’, I could have got more but for the lack of hop-up effect, caused in the end by user error... after a quick look over the hop unit and kicking myself a little, I set the hop and used the gun in an out door game, The range was excellent but the known air-leak was not helping the gun. Upgrades
So time to get to work, this AEG was only used with a 8.4 mini battery at the game and its rate of fire was very respectable and upon taking the gearbox apart the gear's and piston looked ‘still as new’.
The main issue was the air leak from the nozzle and already knowing the problem area's we set about sourcing some upgrade parts. We settled on KingArms parts for the upgrades due to their quality, compatibility and durability – after all the trouble we have gone to, we hope it’s a while before we have to do any more to this gearbox!
Parts Used:
KA metal cylinder head for the AUG (KA-04-12)
KA tappet plate for the g36 (KA-TP-03)
KA V3 Bearing spring guide (KA-05-05-N)
KA gear sector Clip (KA-PA-01)
Top Tip
Now why the AUG cylinder head I hear some of you asking, well the Ares G36 has a longer nozzle than a standard v3 so it’s a perfect after market part for this gun.
Fitting
As soon as I got my hands on these parts I could not wait to get them in the gun.
First up, the cylinder head and it’s a nice looking bit of kit, shame it’s going to be hidden in the gearbox. It’s an aluminum head that’s been
CNC machined and fitted with an oil and friction resistant O ring and is a great fit into the Ares cylinder, it also has a nice rubber buffer to provide cushioning from the piston.
On fitting the cylinder and standard nozzle, I did a quick piston pressure test and as I had hoped the nozzle is a snug fit with no air leaking. Now, I could leave the gun like this but since the tappet plate is a little worn I opted to fit the King Arms G36 tappet plate, its a nice red unit and is meant for high performance AEG’s so it will work a treat in this gun. The plate is a light weight unit that also sports extra strength over a standard unit. It fitted in the gearbox like a glove and didn’t require any sort of ‘modding’ to fit.
The Bearing Spring Guide, if your gun is not fitted with a bearing piston head or guide they are well worth fitting, however do NOT fit both. These are fitted to minimize the load on the motor caused by the spring torsion. The KingArms spring guide is a simple metal unit, but why KA? Well the Ares G36 sports a quick change feature and the thrust bearings on the KA unit pass the hole at the back of the gearbox, I have tried 2 other makes of bearing spring guide and only the KingArms unit is the correct size. The spring guide still needs to have the locking wings cut down a little to fit the gearbox, but this is not a difficult job with your trusty Dremel.
Now I'm not going to fit the Gear Sector Clip just yet as the gun is only running on a 8.4v mini battery but if I was to run a 11.1v lipo or higher I would have to fit it. All it does is delay the release time on the tappet plate as high ROF guns will some times suffer from feeding issues. I was going to take the time to shave down the 2nd and 3rd tooth on the piston on this AEG but after each use the gun has been stripped down and checked over with no noticeable wear on the piston. But I would advise you to carry out this mod on your pistons, as it can prolong the pistons life.
Those of you following this series will notice that the ‘Phoenix’ has been used both before and after the fitting of the KingArms upgrade parts. The effect for me has been very noticeable with an increased FPS, up to 338 but it was also producing a consistent FPS with only a two fps difference between shots on a standard spring. The KingArms springs also gave some nice results again being very consistent, these results coming in at 302fps (92.21mps) for the M90 and 344fps (104.90mps) for the M100, the AEG also gave excellent range and groupings.
I can fully recommend the KingArms upgrade parts for the Ares G36c, the parts fitted have proven their worth in my hands with complimentary comments from fellow players at its performance.
The final part to this story will be some reviews from a couple of experienced airsofters who have asked to test run this gun and give it a good run out ........ What will they think of it?
Next Time, the Final Chapter...Players Reactions to project ‘Phoenix Rising’....
Catch up with previous posts in this series:
Phoenix Rising Announced
Phoenix Rising PART ONE - Spotting the Bargain
Phoenix Rising PART TWO - The Build
Phoenix Rising PART THREE - Rise of The Phoenix
Phoenix Rising PART FIVE - Player Feed back - the final installment
Follow new posts via TWITTER:
http://twitter.com/Airsoft_Odyssey
Checkout the KingArms website for more great upgrade parts from shims, gears, mech boxes, motors and more plus their range of AEG's and accessories
This Article & pictures are copyright 2011 by Yossers Airsoft Odyssey © and John Williams and may not be be copied or reproduced without permission. You may link to this page.
Project Phoenix Part3
Special ProjectsPhoenix Rising – The ARES G36c from the ashes
The story of a Rebuild Bargain
PART THREE – Rise of the PHOENIX
The mission is clear, A high end AEG for little cash!
You should now have a working AEG, NOW how to IMPROVE it. So It’s Assembled
We now have the AEG assembled, checked and in full working order. So lets look at ways to improve the AEG ready for use in a CQB environment at my local site SWAT Urban Area51.
SWATS CQB site is located at Shotton Nr Chester and is a great mix of open spaces and tight multifoor buildings with long corridors, stair cases with some areas pitch black requiring the use of torches and some areas best suited for pistols. Personally my preference is for a compact rifle and this G36c with its folding stock and ambidextrous controls is well suited to this varied environment.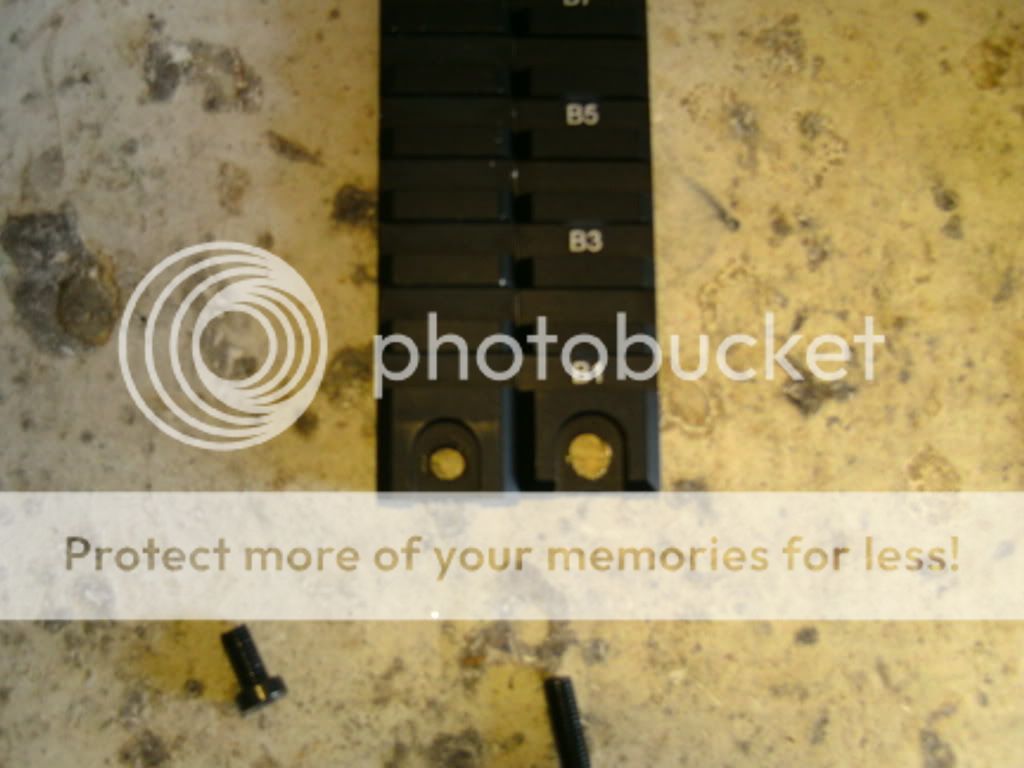 A Bit of Modding
So we’ve assembled the AEG and we’ve proven it can be used at a skirmish, but there are some jobs to do on the exterior of our prize.
First port of call is that missing selector switch. There are a couple of options available to us, buy new from a shop if you can find them in stock or hunt around the various airsoft forums for parts.
I started off posting in the Wanted Sections of forums like ZEROIn and Arnies but with little success. So I widened my search to old threads of broken up G36's again with little success but on an off chance I had a quick check of Ebay and touched lucky by finding a new TM G36 left hand selector auction that had just started. I agreed a "Buy it Now" price with the seller and a week later the part arrived and took all of 30 seconds to fit to the gun.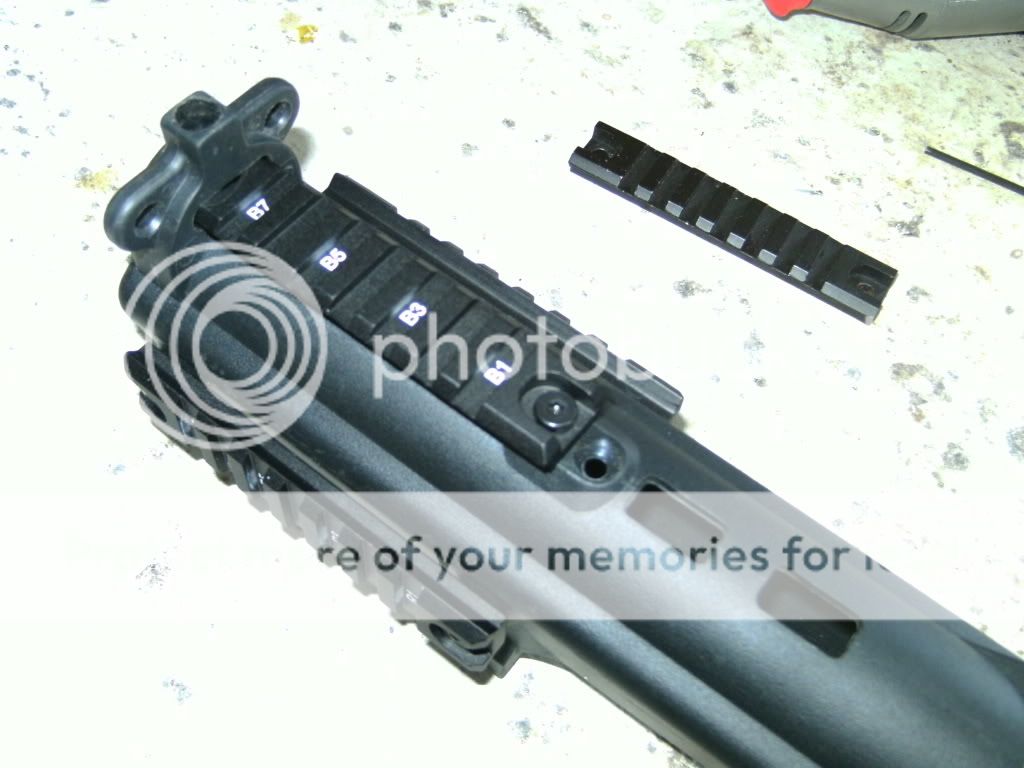 Examining the AEG it looked naked with only 1 rail under the hand guard and due to AREA51 having pitch black area's I knew it needed a torch attachment at the very minimum. So started the hunt for a rail system and lucky for me came across the Guarder rails in a set that had never been used and was still sealed, up for sale at £7, bargain, as shops are selling this very set for £20+ in the UK.
Once the rails got here I started fitting them and the 2 side units went on with little effort but the bottom rail was a little smaller, I had to use a Dremel with an old drill bit to make 1 of the fitment holes longer with a bit of ‘bodging’ but the work only took seconds and once the rail was fitted you could not tell it had been modded.
Accessorize!
Now with the rails in place, I needed a torch and mount, so I have picked the King Arms off-set torch mount for this gun due to its quick detach facility. Also the angle is great for using just my thumb to control the torch and the look & finish of this unit is far superior to others of this type including the clone. I am not using a pressure switch with the torch as I am not keen on wires all over the place and I can swap the torch easily between rails and AEG’s as required.Next up back to Ebay and found a cheap Cree 300lm compact torch with feature's such as high power and strobe again for the grand price of £7. It’s a nice looking torch and is just the right size for the G36c. I have placed the torch on the left hand side so I can use my thumb to control it. PLEASE CHECK with your site and people you airsoft with BEFORE using a Strobe type torch.
I will not planning on using any type of laser or optic on this gun as I prefer to use iron sights.
This AEG is fully working and is now in a good skirmishable condition and available for use in anger!
Next we will look at Internal Upgrades....
Catch up with previous posts in this series:
Phoenix Rising Announced
Phoenix Rising PART ONE - Spotting the Bargain
Phoenix Rising PART TWO - The Build
Phoenix Rising PART FOUR - The Phoenix Strikes
Phoenix Rising PART FIVE - Player Feed back - the final installment
Follow new posts via TWITTER:
http://twitter.com/Airsoft_Odyssey
Checkout the KingArms website for more great upgrade parts from shims, gears, mech boxes, motors and more plus their range of AEG's and accessories
This Article & pictures are copyright 2011 by Yossers Airsoft Odyssey © and John Williams and may not be be copied or reproduced without permission. You may link to this page.
Project Phoenix Part2
Special ProjectsPhoenix Rising – The ARES G36c from the ashes
The story of a Rebuild Bargain
PART TWO – The Build
The mission is clear, A high end AEG for little cash!
Now if you’ve followed part ONE you to could have just a bunch of parts! What to do with them?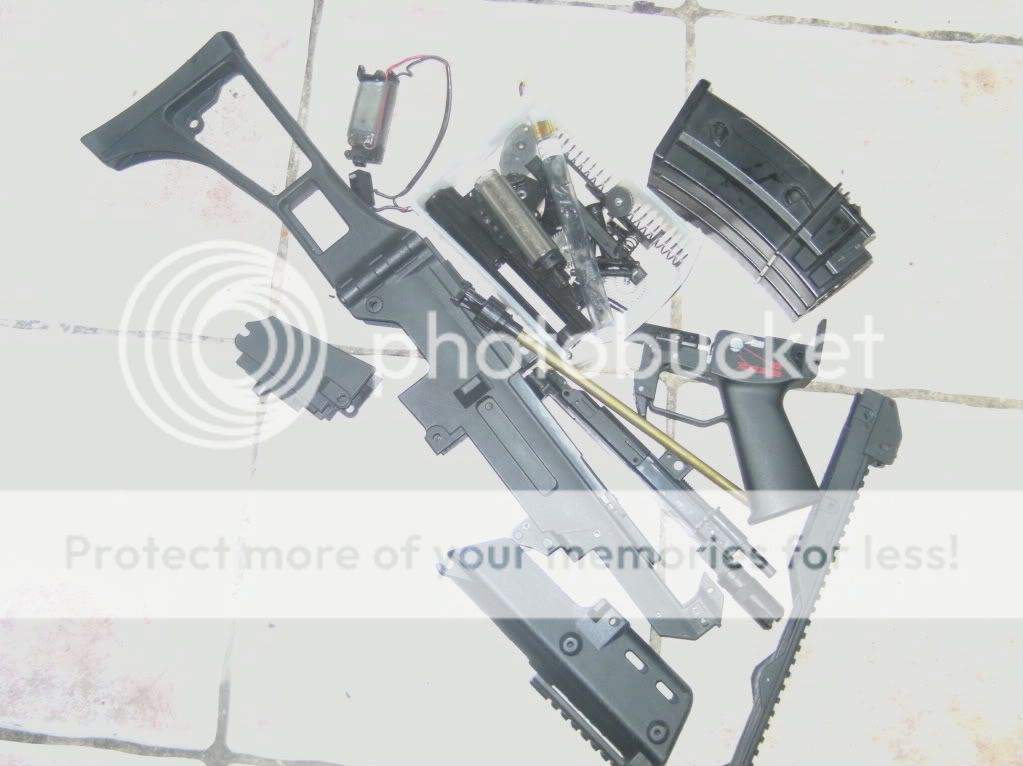 A Box of Parts (Rattle, Rattle)
Now we have a bunch of parts ready to be built up into a working Airsoft AEG. Having never worked on the ARES G36 before I thought it prudent to sort out the parts on a table first and take stock of what I had and give them a quick visual check.
After sorting the bits & pieces out into groups like gearbox and body parts I use good old Google and download from the STAR website a diagram of there G36c setup. Remember that there are loads of web sites about the internet that have all sorts of AEG and GBB diagrams for you to use as reference material.
A quick comparison with the official diagram I find only 1 part is missing and that’s the left hand side selector switch (not a big issue). I then assemble the body work, upper rail and the lower grip with its gears and selector switch and then move on to the Gearbox. The Gearbox
The ARES G36 use's a modified V3 gearbox shell as this gun does not use a traditional V3 switch set up, instead it uses a micro switch setup. After a quick test (by hooking up a battery to the motor and switch) I find this is all working to my relief. I am not going to bore you with how to build up this gearbox as there are some great guides on the Interwebs in the usual places such as YouTube and Mechbox.com.
Rechecking over the parts for the gearbox I notice the gears and piston are very clean with little or no wear. So the first parts to check are the Piston and Cylinder and carry out a quick pressure test on them. To do this yourself, place your finger over the Nozzle end of the Cylinder and try and push the Piston in, if it goes in with little or no effort then you will need to check the Piston and Cylinder "O" rings as they might need to re-greased or replaced (new "O" rings can be found in packs on E-bay and even B&Q), Lucky for me this time the air seal is solid and the Piston is impossible to push into the cylinder.
I did find a minor problem with the air Nozzle which had a small air leak (found by doing the above test with the Nozzle in place). As I will be upgrading the AEG this shouldn’t be a problem but can some times be solved by getting a small amount of lube and putting it around the brass tube on the Cylinder head (if you can, replacing it at this stage may save you further disassembly down the line!).
Next I start on the shimming, again there are loads of guides on the internet as this is one of them jobs that can’t be rushed (getting it wrong can kill the gearbox, so BE CAREFUL!). After some time and when I was happy with the shimming, I started to build the Gearbox up and only came across one real problem and that was keeping the trigger in place when closing it all up but in the end it went together with no need for the swear jar (every person that works on AEG's has one!).
Assembly
After placing the gearbox in the lower part of the body, I hooked up a battery again to make sure it still worked correctly. A quick burst on full-auto and then a few shots on semi confirmed all worked as it should. Now to turn our attention to the Hop and Barrel, although I had been advised that this had been taken apart buy the seller’s brother all looked fine with no damage, even the barrel was clean! If you should need to clean a Barrel whilst the AEG is apart I always use "SWAN Filter Tips" they come in a box with around 165 tips in all for around 70pence. I find they are a nice fit to standard barrels and get the barrel exceptionally clean.
Since the hop and barrel are okay I started building the gun up and I have to say the Ares G36 is a very easy gun to assemble. The only thing to look out for when putting in the lower body/gearbox is to ensure you push the hop/barrel forward so it all fits together. After assembly of the AEG I just had to get in the garden and have a quick test. The gun came with a mini 8.4 battery of unknown make and its a very tight fit getting it in the hand guard but once in place it can move around so a nice 9.6 mini would fit with little issue.
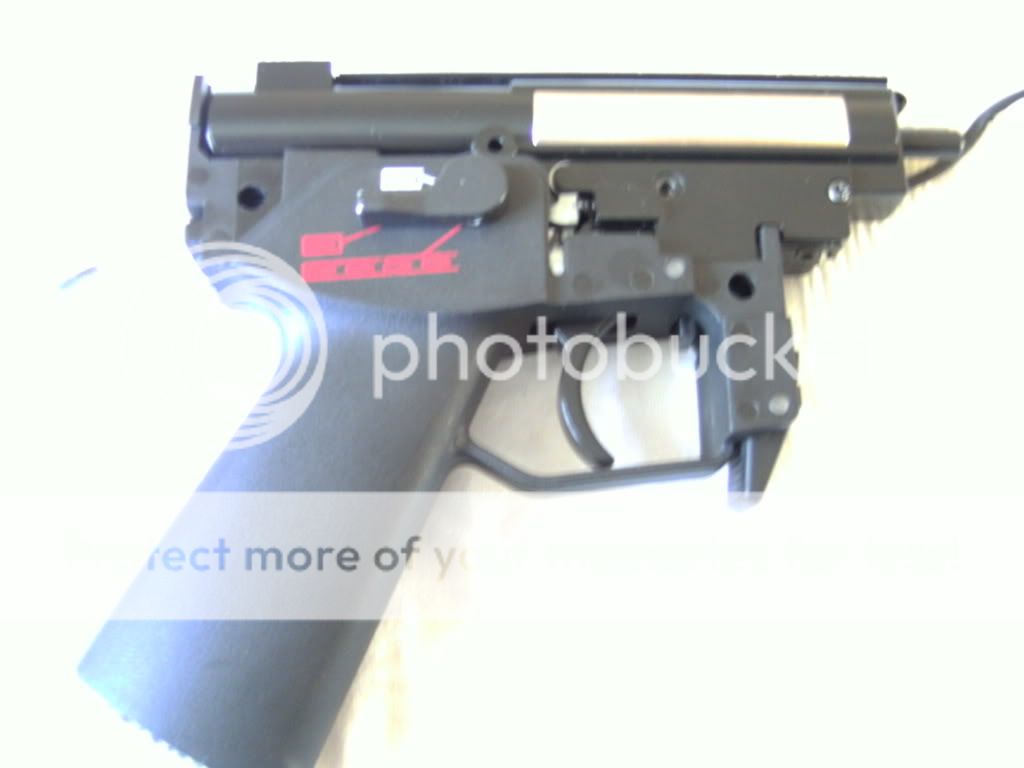 My first impressions of this AEG are "I like this.. ", being mostly plastic I was expecting it to be very light but it wasn't, it had a nice feel and weight, the magazine went in with a firm click with no movement and on aiming at my target the gun fired with little effort and was on target. Even on full-auto using the 8.4 mini gave a nice rate of fire with a crisp trigger response.
Total time elapsed: An hour getting the shimming right and then around 30 minutes building up the AEG and then 10 minutes playing in the garden.
What a great Bargain!
Items for your kit bag!
Now for all the stuff I use when building or fixing AEGs. This is not a full list but it is just to give you an idea:
* Allen keys (different sizes)
* Phillips screw driver's (various sizes)
* Flat head screw drivers (again as above)
* Cylinder and Bearing lubes
* Knife
* Lighter (heat shrinking)
* Pointy object (I use this for placing the likes of tappet plate springs and moving the gear axles when closing the gearbox up)
* Shim's (lots of different sizes)
* Needle nose pliers (small set & large set)
* All I required for this AEG build was a couple of screw driver's, shim's and my ‘pointy object’.
Next we will look at how to improve the bargain AEG!....
Catch up with previous posts in this series:
Phoenix Rising Announced
Phoenix Rising PART ONE - Spotting the Bargain
Phoenix Rising PART THREE - Rise of the Phoenix
Phoenix Rising PART FOUR - The Phoenix Strikes
Phoenix Rising PART FIVE - Player Feed back - the final installment
Follow new posts via TWITTER:
http://twitter.com/Airsoft_Odyssey
Checkout the KingArms website for more great upgrade parts from shims, gears, mech boxes, motors and more plus their range of AEG's and accessories
This Article & pictures are copyright 2011 by Yossers Airsoft Odyssey © and John Williams and may not be be copied or reproduced without permission. You may link to this page.
Project Phoenix Part1
Special ProjectsPhoenix Rising – The ARES G36c from the ashes
The story of a Rebuild Bargain
PART ONE – Spotting the Bargain
The mission is clear, A high end AEG for little cash!
There are different type's of airsofter - those with lots to spend and those who don’t, I fall in to the "those who don’t" category. So how do you go about obtaining a cheap, well known Brand of AEG? A WORD OF WARNING
Before taking on a ‘Project’ or broken AEG or GBB you do need a little skill and confidence with using some basic tools. Most broken guns require just simple little things for example new wiring, wiring connectors, or broken mech-box parts. So being confident in your use of a soldering iron, and basic tools will be really handy and a must for this project, especially if YOU don’t want to be reselling your bargain purchase due to inexperience. This is meant as a guide to show how I went about buying and rebuilding a gun that I have never worked on before but do have 8 years experience with other AEG’s and enough tools to hand to take on the task.
Where to look
Start off looking on the popular Airsoft forums like ZeroIn and Arnies and checkout all of the Broken Gun Sale and Wanted threads or adverts. I usually stay away from the clone guns as some people seem to think that even when broken they’re worth over £100... but if your careful you can get some bargain deals with ACM guns . You will need a bit of luck so check as many forums as possible.
Considerations
Consider carefully and research the AEG you’re going to go for BEFORE embarking on your Project, some are easier than others! Take the Tm Famas range, parts for these guns can be difficult to find and when you do find them they can cost a lot! All of this needs to be budgeted for. For a first project stick to the more common types such as AK, M4/16, G36, MP5 and G3 so plenty of scope in that lot if parts are missing or should need replacing without stretching budgets too far.
Some Basic Questions to ask
Now you have found your perfect project you now need to contact the seller and start asking some questions:
* can you see a photo of the gun or parts (if you can’t be suspicious)
* Cost, how much for the gun or parts (avoid direct payments and cash only offers from new or members with little or no post counts.)
* How is it broken?
* How old is the gun?
Protect Yourself
One great way of protecting yourself against fraudsters and scammers in ANY transaction is to ask them to add you on a social network site like Facebook and get as much contact information as you can - Home number, email address, ensuring that these accounts have been established for some time. These details can all be deleted after the deal has finished, and they can help expose the fraudsters. ALWAYS opt for Recorded Delivery! This might cost a little extra but its worth it for the peace of mind for both parties.
Having done all that I’ve finally settled on my Project AEG and got myself an ARES G36C that has been fully taken apart by a players younger brother. After various emails and looking over the players Facebook page I find all the trusted information I need and the transaction made for the AEG, stripped down in parts with 3 hi-cap magazines and a mini battery all for the princely sum of £60 including delivery. If need be I can make my cash back by breaking it down to parts if needed but I was hoping for a gun to use at my local urban CQB site SWAT AREA51.It’s HERE
Its not long before I get a very worried looking postie knocking on the door holding an Xbox360 box , after a pause he asks “ Do you know what your expecting? “ as he gives the box a little shake that results in a sound resembling a broken vase . He was soon happy to find out it was meant to sound like that… and was not a smashed Xbox. It gave me a little chuckle at least.
The parts were not well packaged, but this was a broken gun at the end of the day and the seller had kept the gearbox parts all together in a zip lock bag luckily for me.
After a brief look over the parts and ‘stock take’ I was happy only to find 1 cosmetic missing part and that was the left hand side selector switch. All major body parts had very little wear – I thought I’d nabbed myself an excellent bargain!
Next we will look at building the gun up and if it even works....
Catch up with previous posts in this series:
Phoenix Rising Announced
Phoenix Rising PART TWO - The Build
Phoenix Rising PART THREE - Rise of the Phoenix
Phoenix Rising PART FOUR - The Phoenix Strikes
Phoenix Rising PART FIVE - Player Feed back - the final installment
Follow new posts via TWITTER:
http://twitter.com/Airsoft_Odyssey
Checkout the KingArms website for more great upgrade parts from shims, gears, mech boxes, motors and more plus their range of AEG's and accessories
This Article & pictures are copyright 2011 by Yossers Airsoft Odyssey © and John Williams and may not be be copied or reproduced without permission. You may link to this page.
Nab an AEG Bargain
Special ProjectsPhoenix Rising – The ARES G36c from the ashes
The story of a Rebuild Bargain
You want an AEG to add to the armoury but times are hard, the countries tightening its belt (aren’t we all!) and you’re a bit short on cash to spend. Well let John Williams & Airsoft Odyssey guide you through the potential pitfalls and help in grabbing that bargain and the rebuild and upgrade process.
Searching the internet we have found a ‘failed project’ gun and poured love, affection and a smattering of quality upgrade parts by King Arms to breathe life into this formerly unloved AEG.
This will be a multipart series with pictures to guide you through the process and of course some sage advice if you’re thinking of taking on such a project. Airsoft Odyssey will take you through the sometime daunting process and hopefully we'll all learn something along the way as this ARES G36c is rebuilt.
Turn your bucket of parts into a prize CQB AEG
If you’re a beginner at this upgrade malarkey this is definitely one to follow. Sign up for updates from the blog to make sure you don’t miss a single part. May be you’ll gain the confidence to save yourself some dosh, do a little maintenance on your own AEG’s or even start your own project!
Bag a bargain and we'll show you how, every step of the way. Making it easy for you to upgrade and repair your AEG with upgrade parts by King Arms.
Catch up with all the posts in this series:
Phoenix Rising PART ONE - Spotting the Bargain
Phoenix Rising PART TWO - The Build
Phoenix Rising PART THREE - Rise of the Phoenix
Phoenix Rising PART FOUR - The Phoenix Strikes
Phoenix Rising PART FIVE - Player Feed back - the final installment
Follow new posts via TWITTER:
Follow @Airsoft_Odyssey
Checkout the KingArms website for more great upgrade parts from shims, gears, mech boxes, motors and more plus their range of AEG's and accessories
This Article & pictures are copyright 2011 by Yossers Airsoft Odyssey © and John William and may not be be copied or reproduced without permission. You may link to this page.
Special Projects
Special Projects
Home Of Special Projects on the Blog
Checkout these projects to get your DIY skills going:
Phoenix Rising – The ARES G36c from the ashes
The story of a Rebuild Bargain
You want an AEG to add to the armoury but times are hard, the countries tightening its belt (aren’t we all!) and you’re a bit short on cash to spend. Well let John Williams & Airsoft Odyssey guide you through the potential pitfalls and help in grabbing that bargain and the rebuild and upgrade process.
Introduction
Part 1 Spotting the Bargain
Part 2 The Build
Part 3 Rise of the Phoenix
Part 4 The Phoenix Strikes
Part 5 Player Feedback - The final installment
 Home Made SAPI Plates – For the Flyye WSH Weesatch
A Brief How To Guide
Includes:
Materials required to do the make
Plus guidance on what you need to do
Check it out:
Home Made SAPI Plates (for your Flyye WSH Weesatch)
CheckOut Military1st.co.uk for plate carriers and tactical kit.
Phoenix Strikes Back – A TM G36K Recoil Sheds its skin for a new look
How a TM G36K 'Recoil' shed its skin for a new look
Modding a new TM rifle which is your pride and joy just for a new look can be scary! JohnnyJ the Tech guy from Raptor Airsoft takes you through a process step by step in his lates guide and offers advice and help along the way.
Phoenix Strikes Back
 DIY Pistol Case – A Peli 1550 Case gets a new lease of life as a multiple carry Pistol Case
check out how to make yours!
Got loads of Pistols? Heading off with bags and bags of Pistols for IPSC or target shooting - this is the answer for you and it protects your pistols well in transit. Don't pay silly money for a case - make your own, Yosser shows you how.
DIY Pistol Case
 Magpul PTS PDR – Magazine Lock & Loading Issues?
Find out how to FIX IT here!
So did you get a PDR and suffer some magazine issues with your latest pride & joy? - It's an easy enough fix - find out from Raptor Airsoft what you need to do - its really really easy!
PDR Mag FIX!
 Rapid Wraps - Mag Wraps
By US Night Vision Corp
Find out how to give your M4 Mags a stylish 'make-over' using these mag wraps - Rapid Wraps from US Night Vision Corps. These are available in a variety of camo styles, so matching your loadout shouldn't be a problem.
Rapid Wraps - fitted!
KEEP UP to DATE with Airsoft Odyssey via all these Multi-Media Outlets - please click the icons and Support the BLOG on:











ClustRMap

Popular
-
News Archives Boneyard UKARA NOT REQUIRED @ The NAE - National Airsoft Event Report by Special Correspondent Maree Now this blog ha...
-
Kitbag Armoury SiG 552 ‘Commando’ by ICS - A Review by Yosser With a reputation for quality AEG’s produced by ICS expectations were high w...
-
News Archives ++Breaking News++ UK Airsofters to get NEW Representative Body Great news filtering through for UK Airsofters of a NEW repre...
-
News Archives Rattling the Tigers Cage! VCRA Reboot Reporter: Yosser BREAKING NEWS++BREAKING NEWS++BREAKING NEWS++BREAKING NEWS++BREA...
-
Kitbag Armoury CZ75 P-07 Duty CO2 GBB Pistol - Reviewed by Yosser For some reason, which I can’t fully explain, I must confess to having...
-
Introducing a Dedicated North West Airsoft Retailer: 'Dingodog's Airsoft & Tactical Supplies' - A Review by Yosser Imagine ...
-
Kitbag QuarterMaster Helikon GunFighter Jacket - Reviewed by Yosser The Gunfighter Jacket has been out and about on general release for...